Live-Edge Coffee Table with Hairpin Legs
A tutorial by


Our supplies list:
- 4 – Hairpin Legs, in desired height and finish (we chose 16" in jet black satin)
- Live-edge slab
- Orbital sander and sanding discs (we used 80-, 120-, and 240-grit)
- Finish (we went with teak oil)
- Brush or rag to apply finish
- Level
- Pencil
- Slices of 2x4s for levelers, if needed (to level out an uneven slab)
- Drill/driver and bit
- Screws (we used #8 x 1-1/4" screws)
- Safety gear such as eye protection, a mask/respirator and gloves

Mark Won
I love using recycled/upcycled material to build beautiful furniture fit for any modern home. Officially, I’m a Semi Exact employee, but tinkering and DIY has been a hobby since childhood. Added dream job bonus: pursuing my love of interior design.
I hope to learn from the many skilled makers out there, and to turn my builds up a notch!

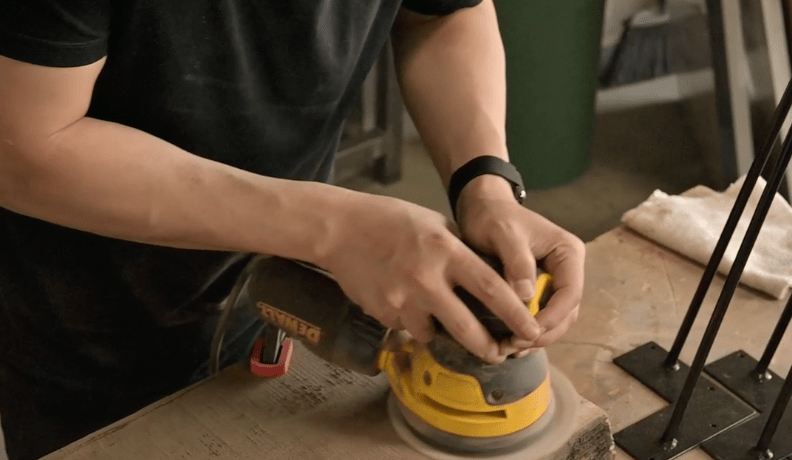
Step 1:
Sand the slab
This slab hadn’t been planed or sanded, so we sanded it smooth using an orbital sander, and progressing from 80- to 120- and 240-grit sanding discs. Don’t skimp on your efforts here! We ended up spending about 90 minutes sanding this down.

Step 2:
Apply protective coat
Wipe your slab down of any remaining sawdust. Many folks choose to stain and apply a clear coat finish to protect raw wood. We wanted to highlight all the imperfections and character of the wood, and chose teak oil as a one-step finish. We applied three liberal coats, and let this dry overnight.

Step 3:
Arrange your legs
Play around with your arrangement until you get the proportions that you’re looking for! We tried three- and four-leg arrangements, and also tried pushing the legs out. We decided to push the legs a little closer to the middle. No reason, we just liked the look!

Step 4:
Measure and level
Again, we knew we were using an uneven slab, so we came prepared with some 2x4s that were cut in various thicknesses. In this particular build, though, we cheated a little, and leveled out our slab by adding an extra base plate from our factory underneath one of our Hairpin Legs.

Step 5:
Drill ’em!
Use a pencil to mark the holes in each Hairpin Leg base plate, then drive your screws through—it’s that simple!

Step 6:
Enjoy your table!
While using an orbital sander may sound intimidating for beginners, you'll quickly realize it's nothing to be scared of! And the result will be something you can show off to all your friends and family, and your little table will truly be one of a kind.